City of Melbourne provides services to the construction and business sectors, issuing permits for activities in public spaces to ensure compliance with legislation, industry guidelines and our local laws.
We have recently made it quicker and easier for you to apply for these permits.
Page Content
Improvements include:
- saving your details securely in an individual account, removing the need to re-enter details when making amendments and applying for multiple permits
- providing 24-hour access to an online system, enabling you to check application status, make amendments and obtain copies of your permits and invoices.
To use our online system, you will need to create a City of Melbourne Services account. Creating an account takes around three minutes.
We've created some frequently asked questions and guides to support you.
FAQs and guides
We have moved some of our permits to a new online system, which requires an account to access.
There is no paper-based option available for these permits; all applications must be submitted via the online system.
To create your account, you will need to provide:
- your given name and family name
- your email address (not a shared email address).
You should create an account under your personal name, not your business or client’s name.
Each account needs to have its own unique email address, so a company's general email address (e.g. info@mycompany.com.au) is not suitable. The same email address cannot be used by multiple people.
You can link a permit application to a principal contractor (e.g. Multiplex) if you need them to have access to your permit. You can also apply for a permit on behalf of someone. You will need to indicate this in your application.
The requirements are as follows:
- User ID: your email address
- Password: must include at least 10 characters, one upper case letter, one lower case letter and one number.
Each time you log in to City of Melbourne Services, a one-time verification code is sent to the email address you used to create the account. This code is a series of numbers and/or letters used to confirm your identity.
Your account will be locked after five incorrect attempts at entering the code. To unlock your account you'll need to contact us on 03 9658 9658.
To create a new account, follow these steps. You only need to do this once.
- Go to the
City of Melbourne Services website.
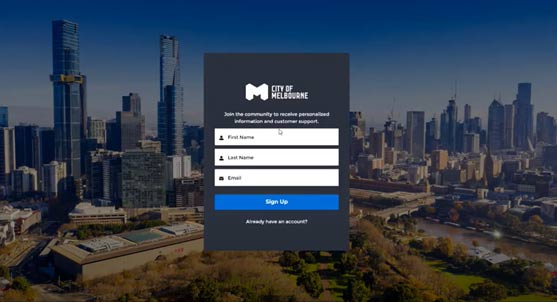
- A window will appear for you to fill in your details. Enter your
First Name, Last Name and
Email in the corresponding fields, then click
Sign Up.
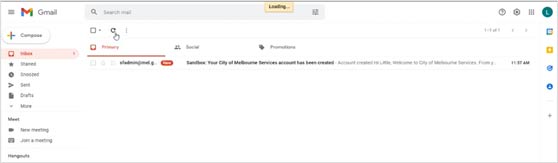
- You will be asked to check your email – go to your email inbox.
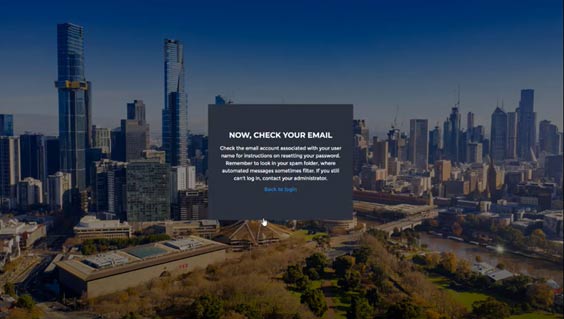
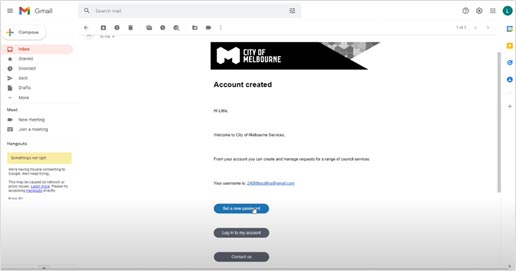
- You will have received an email from us confirming your account has been created. If you didn’t receive an email from us, check your spam/junk folder.
- You will need to create a new password. In your email, click on
Set a new password.
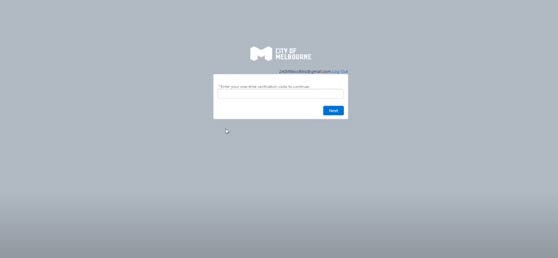
- This will direct you to the to the City of Melbourne Services login verification page which asks you to enter your one-time verification code.
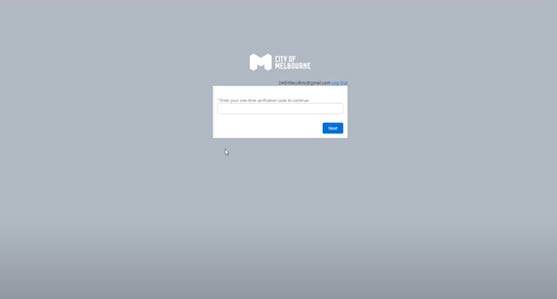
- Go back to your email. Your one-time verification code will have been sent to you in another email.

- Copy and paste the verification code into the text field, and click Next.
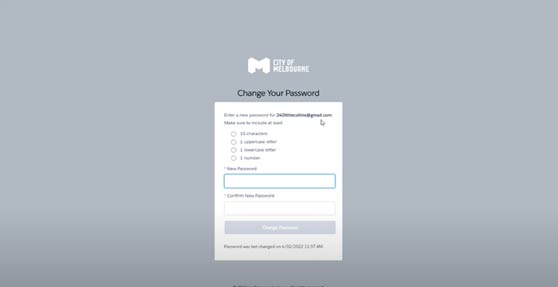
- The
Change Your Password screen appears. Enter a
New Password and
Confirm New Password. Ensure your password includes at least 10 characters, one uppercase letter, one lowercase letter and one number. When you are finished, click
Change Password. (Note: keep your password safe for when you log in in future).
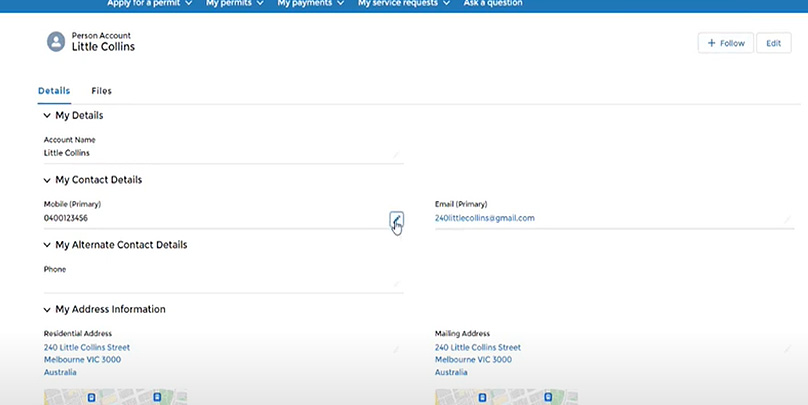
- Your account details screen appears. Complete your
Contact details. To do this, click on the pen icon in the
My Contact Details section.
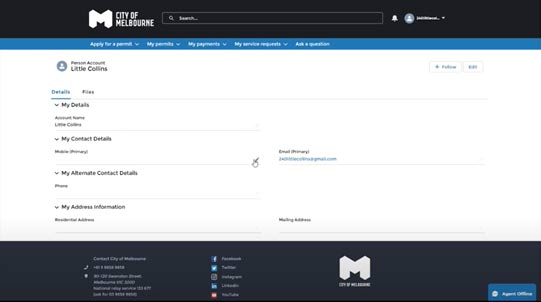
- When you have completed your details, click
Save. Your details will be updated, and your account is ready to use.
You can update the following account details yourself:
- Address – postal and physical.
Note: Statutory accounts (if you are a municipal property owner, occupier or ratepayer) must submit a request via the 'Request address change' button as your information is connected to other records. For example, you may be a property owner separately to being a permit customer.
- Phone number/s
- Email.
Here's how to update your details:
- When logged in to your account, select your profile name.
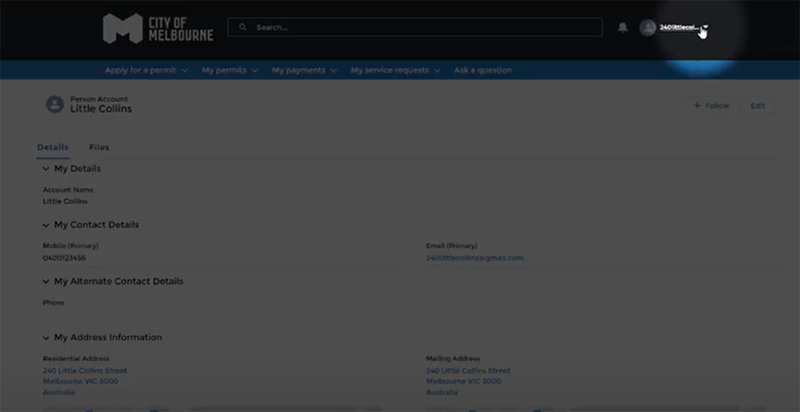
- From the drop-down menu, select 'My account'. This will take you to your account details.
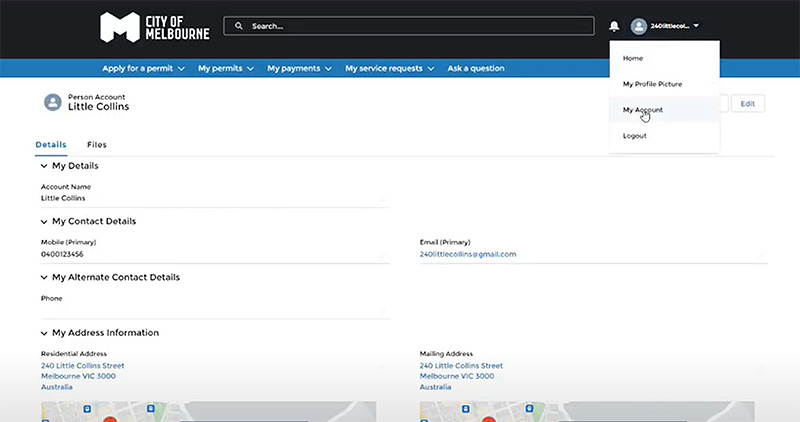
- Hover over the detail you wish to change and click on the
pen icon to edit that information. Once completed, select 'Save'. Your account details are now updated.
You can apply for a permit via the apply button on the corresponding permit pages on this website.
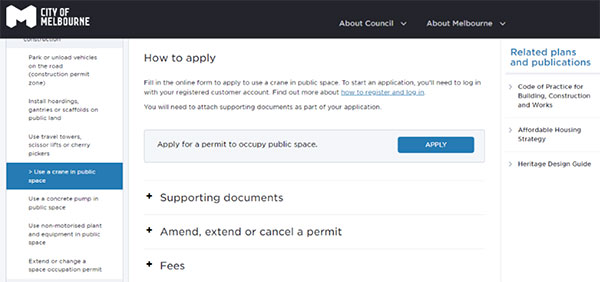
Individual permit application forms are accessed directly from these pages. You will be prompted to log in before launching the form.
You can also create an account and then log in to view the available permit application forms.
If you are unable to create an account, please contact us on 03 9658 9658 and we can set up an account for you.
All permit-related matters are handled via City of Melbourne Services. We issue permits, requests for payment and requests for further information via your email address and online account.
You will still need to log in to the account to apply for permits, action payments or respond to requests for further information.
Alternatively, you can provide someone (for example, a friend or family member) with your login details and ask them to apply for a permit on your behalf.
Check you have entered your email and password correctly.
Check your junk/spam email folders for your confirmation email.
If you require further assistance, please contact us during business hours on 03 9658 9658.
On the login screen, select Forgot your password? and follow the steps to reset your password.
An email from City of Melbourne will be sent to you with instructions for resetting your password.
If you have not received the email, check your junk/spam email folders.
After your fourth unsuccessful attempt to log in, use the Forgot your password? link. After five failed login attempts, your account will be locked and you will need to contact us.
How to reset your password
- Go to the City of Melbourne Services log in page.
- Click on Forgot your password?
- The Password Reset screen is displayed.
- Enter your email address.
- Click on Reset Password.
- You will be asked to Check your email.
- An email is sent to your nominated email account from City of Melbourne Services confirming your password has been reset. Open the email and click on Set a New Password.
- This will direct you to the City of Melbourne Services log in page.
- You will be asked to enter a one-time verification code.
- Go back to your email and refresh your inbox - you should have received a new email with the verification code.
- Copy and paste the verification code into the login page and click Next.
- Enter a new password and re-enter it to confirm. (Note: Keep your password safe for when you log in in future).
- Click on Change password.
- You are redirected to your My Details screen. Your password is now changed.
If your account is locked, please contact us on 03 9658 9658 during business hours.
It may take up 48 hours for your account to be unlocked.
Your customer account details will only be available to City of Melbourne staff who, as part of their role and in the carrying out of their work duties, require them to have access to customer data.
For example, a staff member working in human resources will not have access to your customer account details relating to a permit application.
Account details are stored on a secure server that complies with privacy laws and has been endorsed by the Victorian Government.
No.
To apply for a permit we will require your contact details.
Please contact us on 03 9658 9658 if you would like to deactivate or delete your account.
For security reasons, you will be logged out of the system after 30 minutes of inactivity.
Before being logged out, an alert will appear informing you the session is about to timeout.
If you were completing a form when your session times out, details you entered up to the last time you clicked on Next will be saved.
As of March 2023, you can apply for the following in the system:
More permit and approval types will be added in the coming months.
No.
You must apply for these permits online. Applications can't be submitted by email, post or in person.
The online system will provide step-by-step guidance on how to complete and submit your application as well as advise you on any supporting documentation required.
Your application is autosaved to My permits > My draft permit applications every time you click ‘Next’ and can be accessed to be submitted a later date.
Depending on the location and potential impact of your activity, your stakeholders will vary.
Stakeholders are occupiers of residential properties, business operators, service providers and owners or managers of other land uses (for example, medical, education and aged care) or organisations located or invested in the vicinity of your project, works or activity – including in surrounding streets and lanes. These are people who are likely to be affected by works activity (including noise), temporary infrastructure and changes to access, traffic or parking conditions.
Find out more about identifying and contacting relevant stakeholders impacted by your works.
Add new activities
At this step:
- Select the drop-down option under
Add new activities .
- Select the activity type you’ll be completing from the list.
- In the relevant fields, enter the
Length and
Width in metres of the activity chosen.
- Click
Next to continue.
Activity details
- Our local laws designate times for construction activities to maximise the amenity of residents.
- To add the date and time you’ll be completing your activity, select
Yes from the drop down.
- You won't be able to continue with your application if you don't add at least one date and time for your activity.
Click
Next to continue.
Select dates and times
- In the
Start date and
End date fields, select your relevant dates.
- Select whether your hours of construction are within or outside local laws hours. If selecting outside local laws hours, enter the start and end times.
- Click
Save.
- You can edit dates and times as required before clicking
Next to continue.
Activity Q&A
Depending on the type of activity you’ve chosen, you may need to answer additional questions relating to that activity. For example, there are additional questions for scaffold.
Answer any additional questions and click
Next to continue.
Location (drawing a shape)
At the location step, you can draw and make changes to a shape that indicates the area the activity will occupy:
- Using the cursor, draw a shape on the map that represents the space the activity will occupy.
- To add each corner of the activity, click points on the map.
- To close and complete the shape, click on the first point.
- To enter point editing mode, click to select the activity or click on one of the points.
- To adjust the area it occupies, click on the point and drag to the desired position, or click a mid-line point to add a new corner.
- To delete a point, click on the point and press the delete key.
- To edit the shape or location, click on the shape.
- To finish editing the shape, click away from the shape.
- When you’ve finished drawing the shape, click
Next to continue.
Add more activities
- To add more activities to your application, select
Yes in the drop- down, otherwise select
No and
Next to continue.
- When you’ve selected
Yes, click on the
Add more activities button.
- Follow the
Adding new activities process as outlined above.
- Continue the same process for each new activity you want to add.
Review activities
You can view and edit the activities added to your application in the
Review and Submit step of the application process under
Activity summary.
For each activity you add to your application, you will need to show the location and space occupied by the activity by drawing a shape on a map.
To draw the shape:
- Using the cursor, draw a shape on the map that represents the space the activity will occupy.
- To add each corner of the shape, click and drag on the map.
- To close and complete the shape, click the first point.
- To enter point editing mode, drag the activity to a new position or click on one of the points.
- To adjust the area it occupies, click on the point and drag to the desired position, or click a midpoint to add a new corner.
- To delete an area, click on the point and press the delete key.
- To edit the shape or location, click on the activity.
- To finish editing the shape, click away from the shape.
- When you’ve finished drawing the shape, click Next to continue.
To submit your application, you’ll need to provide supporting documents.
When the system prompts you to upload a document, a link will be displayed to access more information about that document type (for example, public liability insurance certificate of currency requirements). You can also see supporting document requirements on the relevant permit webpage.
Accepted file formats are:
- Documents - .docx, .pdf, .ppt, .pptx, .xls, .xlsx
- Images - .gif, .jpg, .png, .tif
- Drawings: autoCAD, .dwg
- Video/audio: .avi, .mp3, .mp4
The maximum size for each file is 2 GB.
To attach the documents:
- At the Supporting documents step of the application, select Upload files or drag and drop the file from your computer into the relevant field.
- If you have previously uploaded a file that you want to use, click on Previously uploaded files and select the relevant file.
- Select Done when file upload is complete. Your document will appear in the section you have uploaded it to.
- Once you’ve finished adding all your documents, click Next to continue.
To amend, extend or cancel an issued permit, you will need to
log in to City of Melbourne Services and navigate to
My permits > My permits. From there you can see all of your issued permits.
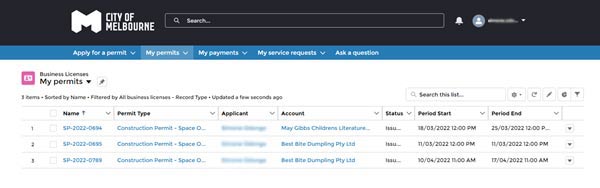
- Click on the permit number of the application that you want to amend, extend or cancel.
- At the far right side, click on the drop down arrow and select either
Amend permit,
Extend permit or
Cancel permit. Note: some permit types can’t be amended or extended.

Amending a permit
- After you have selected Amend permit, the amend options for your permit type will be listed:
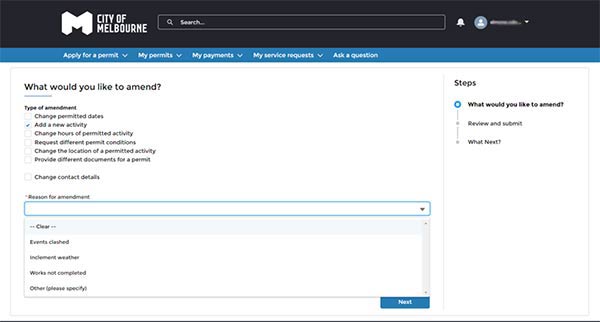
- Select the checkbox for the type of amendment.
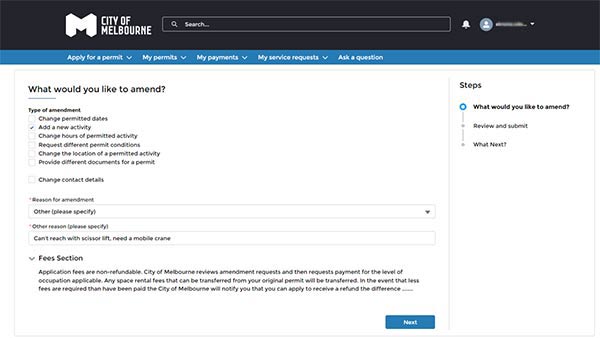
- Select a reason for amendment. If you select
Other, enter a reason in the text field.
- Click
Next.
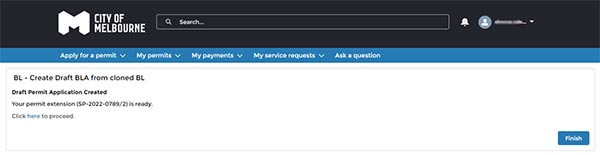
- The system will create a clone of your application. Follow the link to proceed.
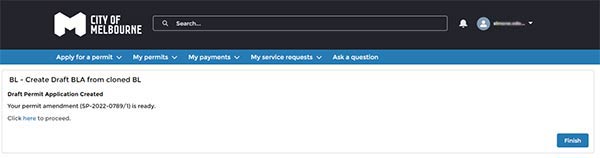
- This will bring you back to the application, where all of your information will be pre-filled.
- Follow the steps through the application as normal.
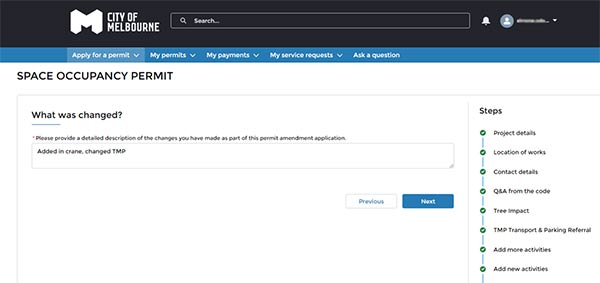
- The form will then ask
What was changed? Enter details of what changes you have made.
- The payment screen will come up advising you of the costs for the amendment and the amendment fee. You will only need to pay for the amendment fee when you lodge this request.
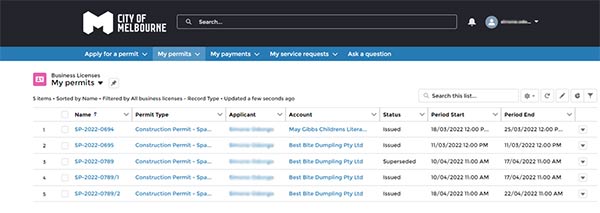
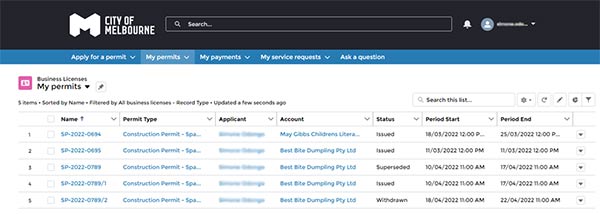
- The permit number has changed to include a
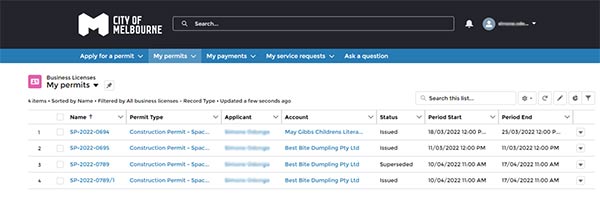
/1 after it. Every time you make an amendment or an extension on a permit, the number after the ‘/’ will increase, noting which version of the permit it is.

- Once your amendment request has been approved, you will receive a payment request.
- Once all fees have been paid, your new permit will be issued with a new ‘/’ number. The original permit number – SP-2022-0789 will be superseded, and the new permit number – SP-2022-0789/1 will be the new issued permit.
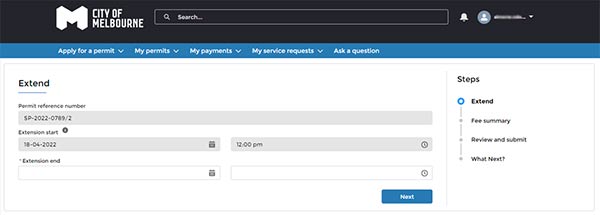
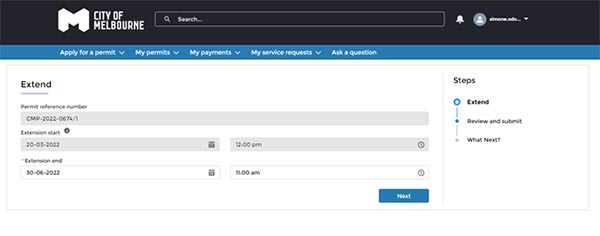
Extending a permit
- If you select
Extend permit, you will go straight to this page.
- The system will create a clone of your application. Follow the link to proceed.
- Enter in your extension start and
end dates and click
Next.
- You will get the same fee summary pages as above.
- Once your extension has been approved, you will receive a payment request.
- Once all fees have been paid, your new permit will be issued with a new ‘/’ number.
Cancelling a permit
- If you select
Cancel permit. You will go straight to this page.
- Enter your
reason for cancellation and click
Next.
- Select
Yes or
No under the
Would you like to apply for a refund? question, then click
Next.
- This shows your receipts. Click
Next to proceed.
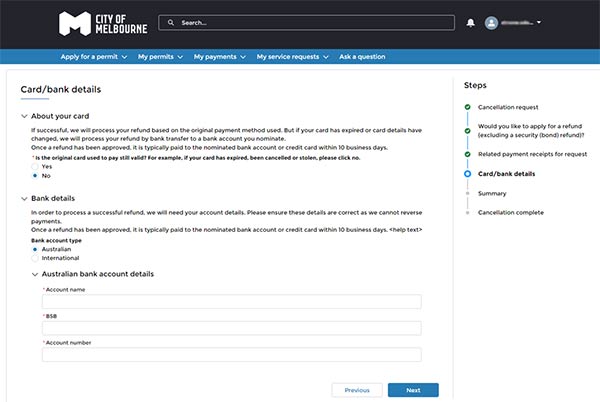
- On the
Card/bank details screen, select
Yes if your credit card details are the same, or
enter bank details if the card has expired, been cancelled or changed.
- Click
Next to proceed.
- The
Summary of your cancellation request will display. Check to make sure you are requesting a cancellation of the right permit.
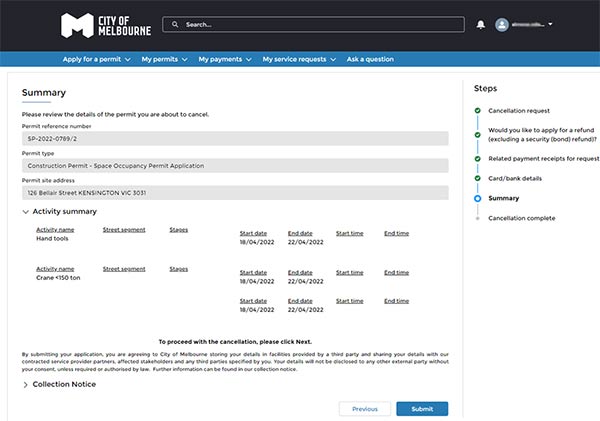
- Once you've verified the details, click
Submit.
- A confirmation of the cancellation will be displayed on your screen. You'll also receive an email confirming your cancellation.
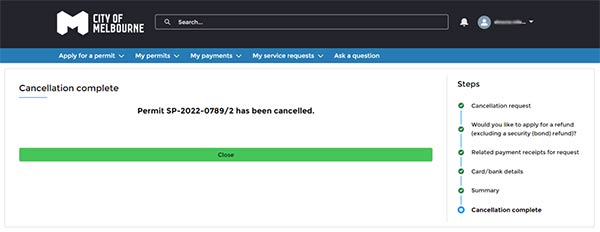
- Now if you navigate to the
My permits page, you can see that the application has been
Withdrawn.
Permit fees for past dates will not be refunded unless we have been notified prior to the commencement of your activity. Application fees are not refundable or transferable.
To request a refund:
-
Log in to City of Melbourne Services and select the
My permits dropdown from the menu bar.
- Select
My submitted permit applications. A list of all your submitted permit applications will be shown. Select the permit you want to cancel to receive a refund for by clicking on the blue link under Application ID column.
- This will bring up your Business License Application with your permit details.
- Click
Cancel Permit Application on the top right of the screen.
- Using the dropdown, select the reason for the cancellation and provide further information if required. Click
Next to continue.
- Select
Yes to apply for a refund.
- Select
Yes then click
Next to continue.
- The payment receipts for the cancellation request will appear. Click
Next to continue.
- If your request is successful, we will process the refund based on the original payment method used. If your card has expired or details have changed, we will process your refund by bank transfer to your nominated account within 10 days.
- If the original card is still valid, select
Yes then click
Next to continue.
- If the original card isn’t valid, select
No and fill in the bank details. Click
Next to continue.
- Review the summary and click
Submit to complete your cancellation and refund request.
To locate your refund request:
- Select
My service requests >My refund request.
- You can view more information on your refund request by clicking on the link in the
Case Number column.
The requirements in the Code of Practice for Building, Construction and Works are intended to protect the public and our property around sites where works are occurring.
Safety and amenity are our primary focus in regulating the use of public space around worksites, and the Code provides clear guidelines to be consistently applied across the municipality of Melbourne.
All our requirements for public safety and amenity within the Code are to:
- Assist applicants to compile quality permit applications that can be assessed faster, without us having to request further information.
- Ensure those undertaking works in and around public space understand our requirements and their obligations.
Precautions must be taken to minimise the danger, risk and disruption posed by construction activity, especially where works are occurring adjacent to public areas, require the occupation of public spaces (such as footpaths or roads) or will have an impact on local traffic conditions.
The additional questions being asked during the application process will ensure that applications can be assessed faster, without the need for us to request further information.
Because our city streetscape is constantly changing, you’re now required to add dates for a CMP approval. This is to ensure the streetscape is accurately reflected in your CMP and remains the best way for you to complete construction. You will not be charged to extend your CMP expiry date.
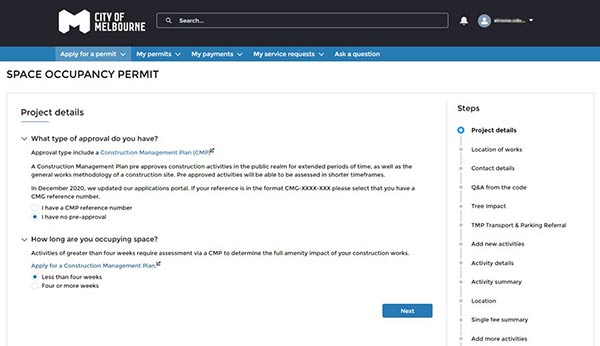
Start the CMP approval application
Once you’ve logged in to
City of Melbourne Services, click on the Apply for a permit dropdown in the main menu and select Apply for CMP approval. Complete the details at each step as follows:
Location of works
- Enter the location of works in the
Site address field.
- Select the
Address.
- Click
Next to continue.
Contact and project details
- Complete the
application details.
- Under
Permit details, select your proposed permit period
start/end dates and times in the relevant fields.
- Click
Next to continue.
Works plan
- Select the relevant stages of works that your project involves: demolition, excavation or construction.
- Select the
indicative start dates and
duration .
- Enter a
description of this stage of works in the text box.
- Select the
principal contractor for this stage of the works.
- Repeat for each stage of works.
- Click
Next to continue.
- Once you’ve logged into
City of Melbourne Services, navigate to the
My permits page.

- Select the CMP that you want to extend.
- The screen showing the CMP details will display. Click on the arrow at the top right corner of the screen, and select
Extend Permit.

- Enter the
Extension dates and click
Next.
- Review the dates that you have entered, and click
Submit.
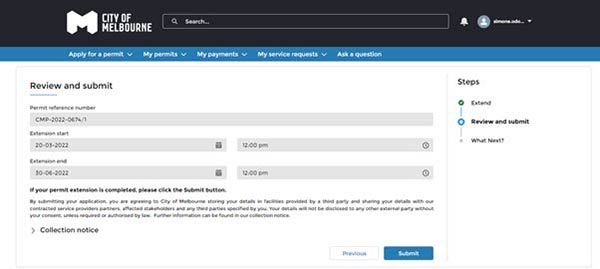
- A confirmation screen will be displayed.
You are expected to plan your works to comply with the Code of Practice for Building, Construction and Works (the Code).
You will be asked during your application if your proposal will comply with the Code.
If you are unable to comply with all requirements, you must advise us about the non-compliance in your application. You’ll need to advise why you can't comply and detail what you propose to do to meet our objectives. This is called a request for exception.
Requests for exception require a demonstrated reason that a requirement cannot be met.
Exception approval is at our absolute discretion. An exception is only approved if explicitly stated in the conditions of your permit.
As you will be submitting your CMP approval application online, fees must be paid at the time of lodgement.
Because our city's streetscape is constantly changing, you’re now required to add dates for a CMP approval.
This is to ensure the streetscape is accurately reflected in your CMP, so it remains the best way for you to complete construction.
You will not be charged to extend your CMP expiry date.
To share your approved CMP or other permits, you will need to be logged in to your
City of Melbourne Services account.
Once logged into the system, you will need to:
- Click on
My permits from the toolbar, then select My permits from the dropdown.
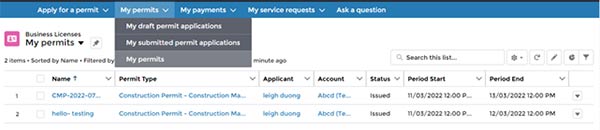
- Click on the relevant
Name of the permit you are wanting to share.
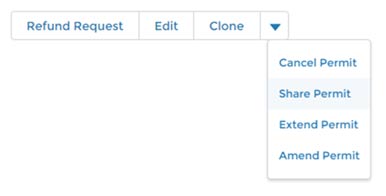
- You will be redirected to a new screen. From this screen, click on the arrow icon in the top right-hand corner of the page and select
Share permit.
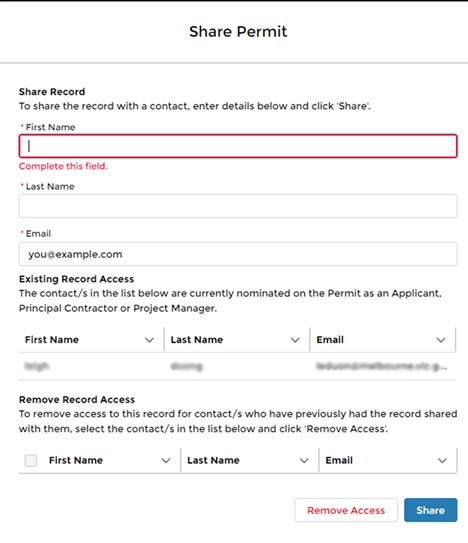
- A new window will display. Enter the details of the person you want to share the permit with and click Share.
Live chat embed code file